OK, I’m not the world’s expert on Infrared, but I’ve dabbled with it, so here’s what I’ve learned…
1) Check your camera.
Different digital cameras have different sensitivity to Infrared. (read the section on conversion below if you want to understand why). The first thing is to test that your camera can actually take infrared pictures: Take your TV remote and your camera into a dark room. Point the remote at the camera and press any button on the remote. Look at your camera’s display screen (for a point-and-shoot) or take a sample shot (DSLR). Do you see a bright light coming from the remote control? If yes, then your camera can take infrared pictures. If not, or if the light is very faint, then you need to try a different camera. In my limited experience, point-and-shoots do better at this than DSLRs.
2) Buy a filter
The most common and most useful IR filter, is an R72 also known as Wratten #89B (various manufacturers make it, from Hoya and B+W at the expensive end, to cheap Chinese imports on ebay). It’s a very dark red filter, almost black. The light that hits your camera is mixed visible and infrared light. The purpose of the R72 filter is to block out most of the visible light and let only the infrared light go through. There is a more specialist filter (Wratten #87C) which blocks all of the visible light, but don’t go there while you are still starting up in IR.
3) Set up your camera for IR
a. exposure
Even though your camera has some sensitivity to IR, it will be much lower than normal. So expect very long exposures, even in bright daylight. Exposures of 1 to 4 seconds are not uncommon, so use a tripod.
b. Focus
Lenses don’t focus the same way on IR as they do on visible light. Most autofocus (AF) cameras will manage this quite well, but if you find that your results are not sharp, it’s worth switching to manual focus (if your camera allows you) and focus by hand.
c. white balance
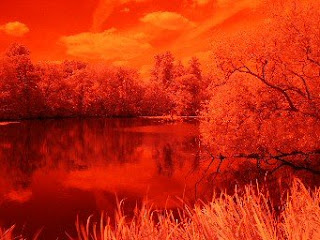
Remember that your camera “sees” all visible and most IR light. When you use a R72 filter, most of the visible light is blocked off, but some of the range of the spectrum that is closest to IR, which is Red, still gets through the filter. Since IR light does not have a “colour” of its own, the only visible colour that your camera registers is the red that seeps through the filter. That’s why everything looks red when you take the picture. You can correct that in post-processing, but most cameras will have some function that allows you to set the white balance (WB) manually. Use that function with the filter ON the camera, to tell the camera effectively that “Red is the new white”. There are different ways of setting WB manually depending on your camera, so I won’t go into it here – read the manual!
4) Experiment!
This is the fun part – go and take IR pictures of anything that will stay still long enough. Try people, buildings, trees, swimming pools, etc. You’ll be surprised how different things look!
5) Post-processing
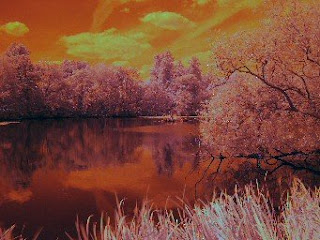
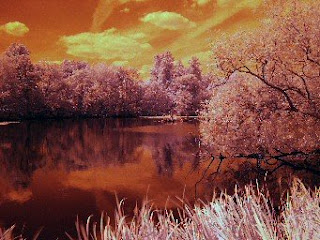
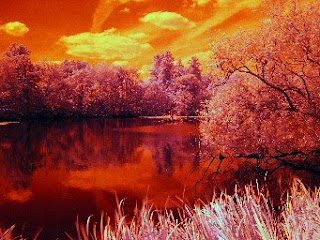
True IR pictures are black & white, since IR itself is the colour. Remember that we’ve blocked all the visible colour spectrum out with the filter! There are techniques of introducing “pseudo-colour” which is what colour IR film used to do, but these are too esoteric to go into here and I don’t have enough experience with them. Typically, IR shots will be low in contrast, so a bit of contrast and curve post-processing will help your shots. Of course you can add colour manually in post-processing, but that’s an altogether different story.
6) Camera conversions
HEALTH WARNING – NOT FOR THE FAINT HEARTED…
If you are not prepared to risk destroying your camera, do not read this section…
Remember that I said in the beginning that different cameras have different sensitivity to IR light? Well actually they don’t. Let me explain. All digital camera sensors (CCD) are sensitive to both IR and visible light. In fact, they are a bit too sensitive to IR, more than film ever was. So the good people that manufacture these cameras, built in an IR-blocking filter in front of the CCD sensor, to make sure that your pictures come out is nice bright visible colours and don’t get messed up by the infrared sensitivity of the sensor. So – what happens if you add an R72 filter that blocks visible light and lets IR go through, in front of a IR-block filter that blocks IR and lets visible light go through? Nothing! You have blocked all light and you get black.
Now, these filters are not perfect. The same way R72 lets some visible light through, so the IR-block filter lets some infrared through. Better cameras have better IR-block filters, which is why DSLRs are mostly rubbish at shooting IR and why exposures are so long.
“Camera IR conversion” is the process of physically taking your camera apart, removing the IR-block filter and replacing it with a clear glass (why not leave it out altogether? – something to do with diffraction – otherwise your camera will never focus again). Now, this conversion will have two possible outcomes: (a) you have just ruined your camera because you shouldn’t really have taken it apart without making note of which screw goes where or (b) you will end up with a camera that lets all visible AND Infrared light hit the sensor. That is bad news for normal everyday photography, but brilliant for IR since you can now use the R72 filter with relatively normal exposures.
I have to add: There are professionals that do these conversions and you can buy cameras that have already been converted. So – if you are serious about IR, it’s worth exploring. Be prepared to pay!
Happy IR hunting!
Labels: infrared ir photography filter R72 conversion
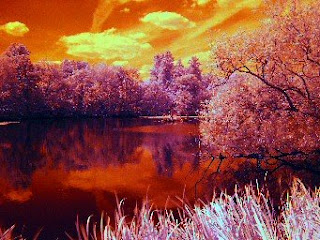 Step 5:
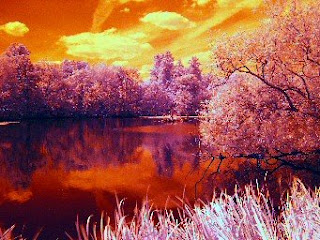


 Step 5:

